Beef Negimaki Recipe (Japanese Beef and Scallion Rolls)
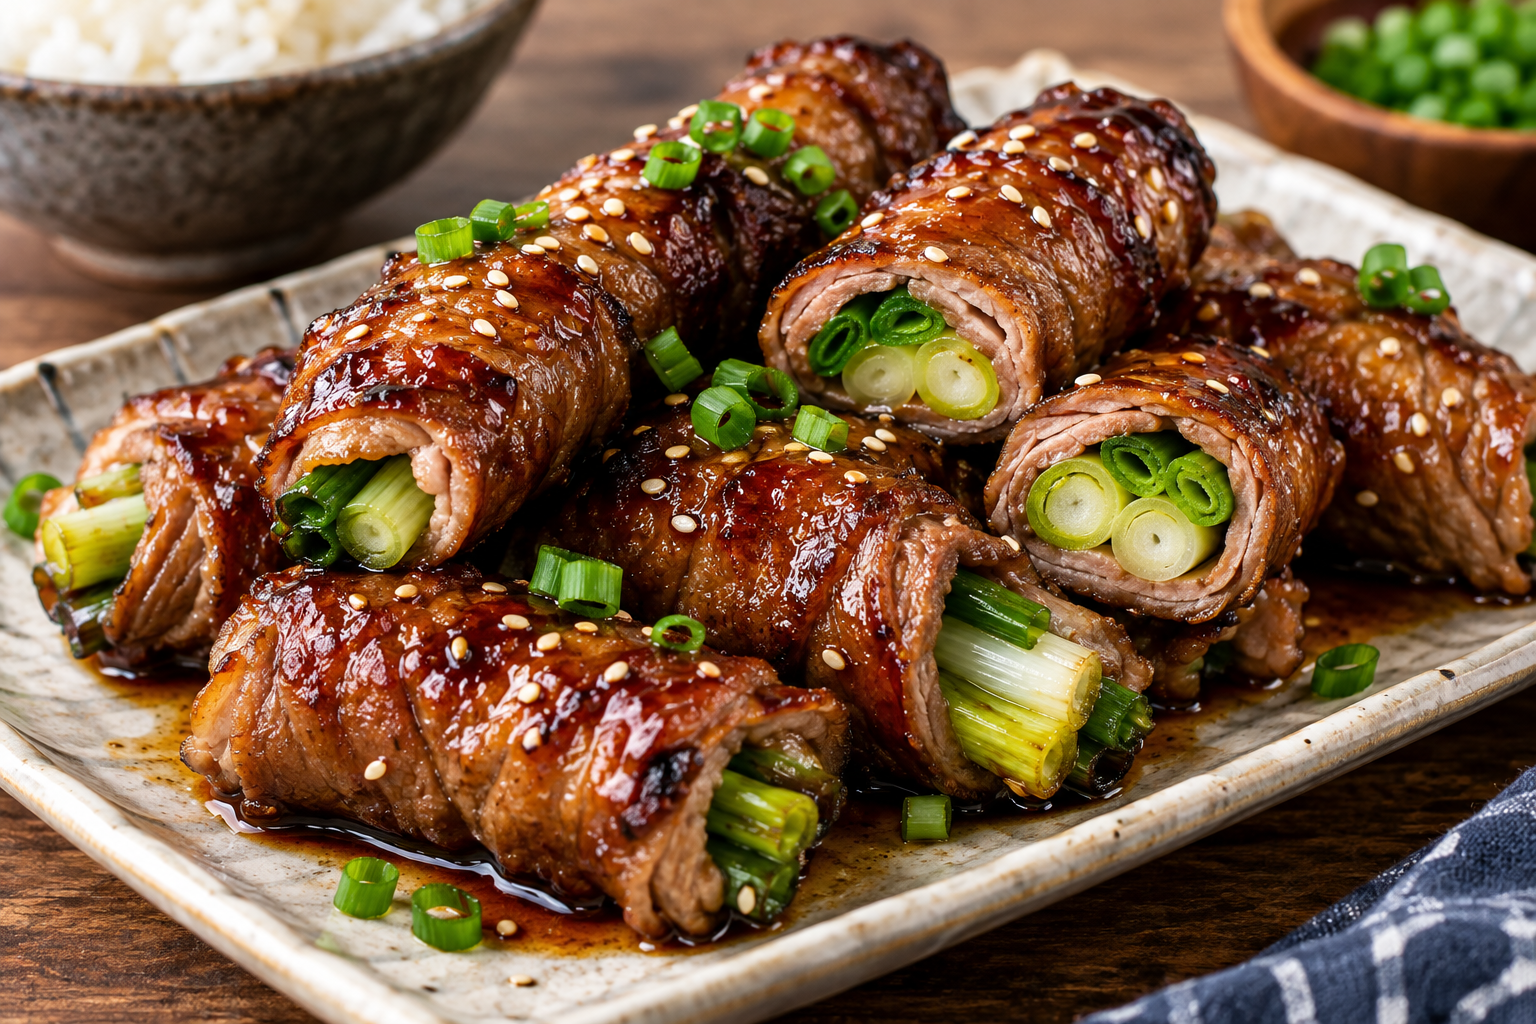
If you love tender beef, savory sauces, and simple Japanese-inspired meals, this Beef Negimaki recipe is one you’ll want to try. Thinly sliced beef is wrapped around fresh green onions, seared until beautifully browned, and finished with a delicious sweet and savory glaze. Every bite combines rich beef flavor with the mild freshness of scallions, making this dish a flavorful option for dinner, appetizers, or special occasions.
Beef negimaki may look like a restaurant-style dish, but it’s surprisingly easy to prepare at home. With a few simple ingredients, a hot skillet or grill, and the right rolling technique, you can create delicious beef rolls that look impressive and taste even better.
In this recipe, I’ll show you how to prepare beef negimaki step by step, including tips for choosing the right beef, keeping the rolls together, and making a flavorful glaze.
What Is Beef Negimaki?
Beef negimaki is a Japanese-inspired dish made with thinly sliced beef wrapped around scallions, also known as green onions. The beef rolls are usually grilled or pan-seared and finished with a soy sauce-based glaze that adds a delicious combination of savory, sweet, and umami flavors.
The word “negi” refers to scallions, while “maki” means roll. The name describes the main preparation method: wrapping beef around green onions to create compact, flavorful rolls.
Beef negimaki is commonly served as an appetizer, but it can also be enjoyed as a main dish alongside steamed rice, vegetables, or a fresh salad. The beef develops a browned exterior during cooking, while the scallions soften and release their mild, aromatic flavor.
Why You’ll Love This Beef Negimaki Recipe
- Full of flavor: A savory-sweet glaze complements the beef and scallions perfectly.
- Easy to prepare: The recipe uses simple ingredients and straightforward cooking techniques.
- Restaurant-style presentation: Sliced beef rolls look beautiful on a serving platter.
- Versatile: Serve as an appetizer, party food, or part of a complete dinner.
- Customizable: Cook the rolls in a skillet or on a grill, depending on your preference.
- Perfect for beef lovers: The combination of tender beef, fresh scallions, and a flavorful glaze makes every bite satisfying.
Ingredients You’ll Need
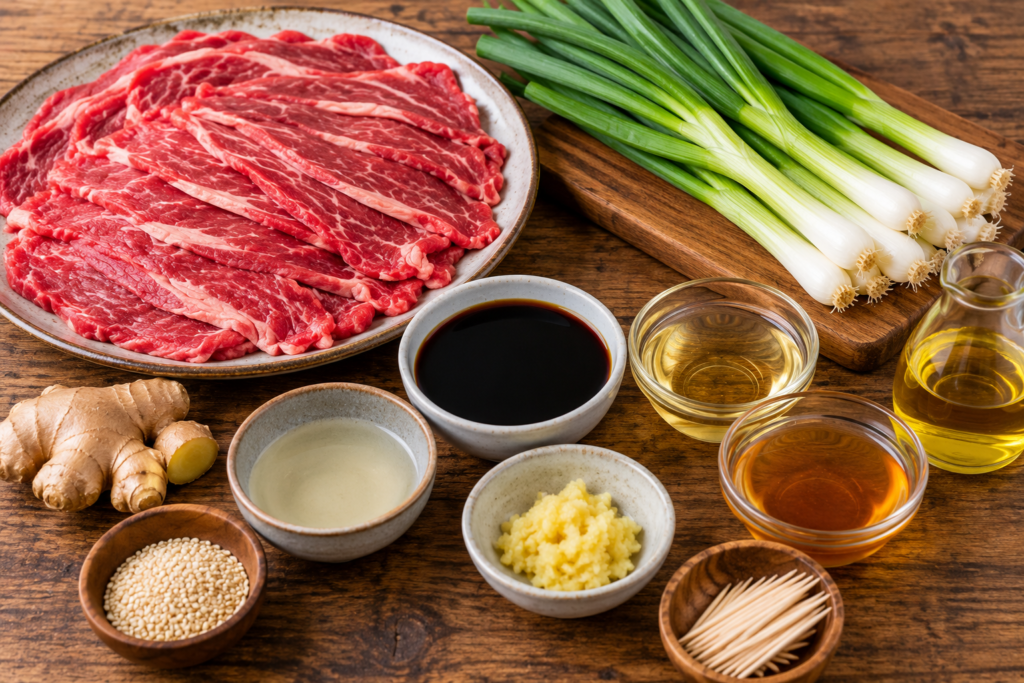
The ingredients for this beef negimaki recipe are simple and easy to find. For the best results, choose thinly sliced beef that is flexible enough to wrap around the green onions.
For the Beef Rolls
- 1 ½ pounds flank steak, thinly sliced
- 12–16 green onions (scallions), trimmed
- 1 tablespoon neutral cooking oil
- Toothpicks, for securing the rolls
For the Sweet and Savory Glaze
- ½ cup low-sodium soy sauce
- ¼ cup mirin
- 2 tablespoons honey
- 2 tablespoons sake
- 1 teaspoon freshly grated ginger
- 1 teaspoon sesame oil
- 1 tablespoon sesame seeds, for garnish
Ingredient Notes
Beef: Flank steak works well because it can be sliced thinly and rolled around the scallions. You can also use thinly sliced top round or ribeye. If you’re using flank steak, slice it against the grain to help improve tenderness.
Green onions: Choose fresh, firm scallions with bright green tops. Trim the ends and use pieces that fit comfortably inside your beef slices.
Soy sauce: Low-sodium soy sauce allows you to control the saltiness of the glaze. Regular soy sauce can also be used, but you may want to adjust the quantity to suit your taste.
Mirin: Mirin provides sweetness and depth to the glaze. If you don’t have it, you can use a small amount of additional honey and water, although the flavor will be slightly different.
Honey: Honey adds sweetness and helps the glaze develop a glossy finish. Watch the heat carefully because sugary sauces can burn.
How to Make Beef Negimaki
Step 1: Chill the Beef for Easy Slicing
Place the flank steak in the freezer for about 20–30 minutes. You don’t want the meat to freeze completely; it should simply become firm enough to slice easily.
Using a sharp knife, slice the beef thinly against the grain. Thin slices make it easier to wrap the scallions and help the beef cook quickly.
If your beef slices are too thick, place them between two sheets of plastic wrap and gently pound them with a meat mallet until they become thinner and more flexible.
Tip: Cutting the beef against the grain helps shorten the muscle fibers, which can make the cooked meat easier to chew.
Step 2: Prepare the Glaze
In a small saucepan, combine the soy sauce, mirin, honey, sake, grated ginger, and sesame oil.
Place the saucepan over medium heat and stir until the ingredients are well combined. Let the mixture simmer gently for approximately 5–8 minutes, allowing it to reduce slightly and develop a richer flavor.
Remove the saucepan from the heat and stir in the sesame seeds if desired.
Set aside a portion of the glaze for serving before it comes into contact with raw beef. If you use the remaining glaze for basting raw meat, do not reuse it as a dipping or finishing sauce unless it is thoroughly boiled.
Step 3: Prepare the Scallions
Wash the green onions thoroughly and trim the root ends.
Cut the scallions into pieces that are approximately the same length as the width of your beef slices. If the scallions are very long, divide them into smaller sections.
Pat them dry with a clean kitchen towel. Keeping the scallions relatively dry makes the beef easier to roll around them.
Step 4: Wrap the Beef Around the Scallions
Place one thin slice of beef on a clean cutting board.
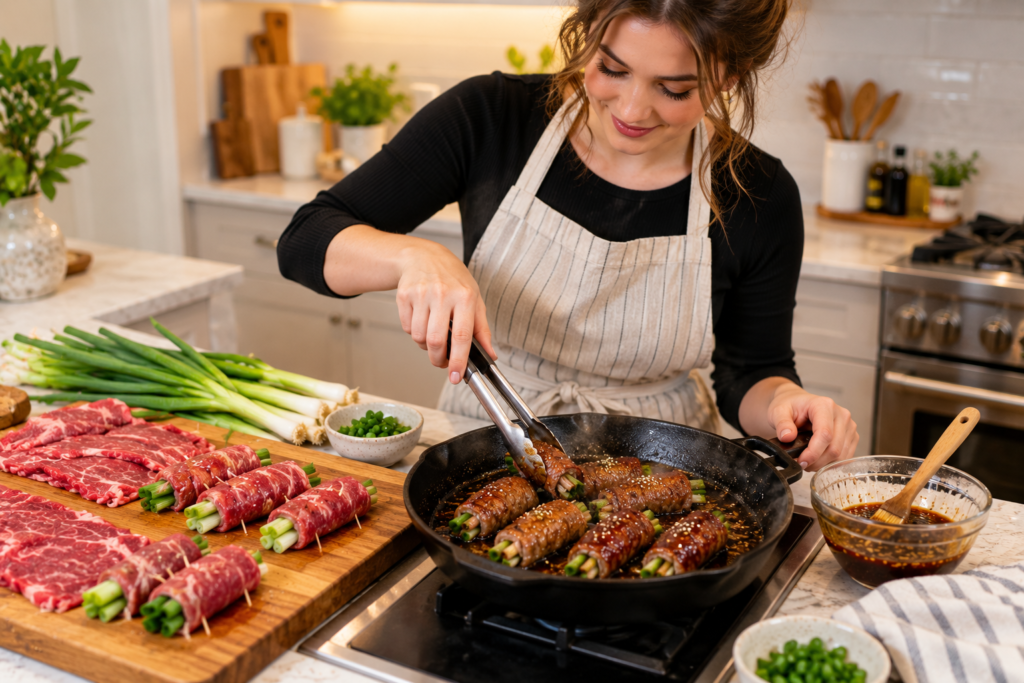
Arrange two or three scallion pieces along one edge of the beef, depending on their size. Roll the beef tightly around the scallions, keeping the filling secure without making the roll too bulky.
Place the roll seam-side down and secure it with a toothpick if needed.
Repeat the process with the remaining beef and scallions.
Helpful tip: Avoid adding too many green onions to each roll. Smaller, tightly wrapped rolls are easier to cook evenly and less likely to fall apart.
Step 5: Heat the Skillet or Grill
You can cook beef negimaki in a skillet or on an outdoor grill.
For a skillet, heat a heavy-bottomed pan or cast-iron skillet over medium-high heat. Add the cooking oil and allow it to heat.
For a grill, preheat the cooking surface and lightly oil the grates to reduce sticking.
Make sure your cooking surface is hot before adding the beef rolls. This helps the meat brown properly rather than releasing too much moisture and steaming.
Step 6: Cook the Beef Negimaki
Place the beef rolls seam-side down in the hot skillet or on the grill.
Cook for approximately 2–3 minutes on the first side, then carefully rotate the rolls using tongs. Continue turning them until the beef is browned on multiple sides.
Brush the rolls with the glaze during the final stage of cooking. Avoid applying too much sauce too early, as the honey and other sweet ingredients can burn over high heat.
Continue cooking until the beef reaches a safe internal temperature. For whole-muscle beef, the USDA recommends 145°F (63°C), followed by a three-minute rest. Because the rolls are made with thin slices, check the thickest portion with a food thermometer.
Step 7: Rest and Slice
Transfer the cooked beef rolls to a clean cutting board and let them rest for a few minutes.
Carefully remove the toothpicks before serving. Slice the rolls into smaller pieces if you want to serve them as an appetizer.
Arrange the beef negimaki on a platter and drizzle with the reserved glaze. Sprinkle with sesame seeds or finely sliced green onions for extra flavor and presentation.
Serve immediately while the beef is warm and the glaze is glossy.
Tips for Making the Best Beef Negimaki
Choose Thinly Sliced Beef
The beef should be thin enough to wrap around the scallions without breaking. If you’re slicing flank steak yourself, chilling it briefly in the freezer makes the process much easier.
Slice Against the Grain
Pay attention to the direction of the muscle fibers when slicing the steak. Cutting across the grain helps improve the texture of the cooked beef.
Don’t Overfill the Rolls
Using too many scallions can make the rolls difficult to close. Keep the filling compact and roll the beef firmly.
Cook Seam-Side Down First
Starting with the seam facing down can help the beef hold its shape while it begins to brown.
Apply the Glaze Near the End
Sweet sauces can burn quickly over high heat. Adding the glaze toward the end of cooking helps it develop flavor without scorching.
Avoid Overcooking the Beef
Thinly sliced beef cooks quickly, so keep an eye on the rolls as you rotate them. Use a thermometer to check doneness rather than relying only on cooking time.
What to Serve With Beef Negimaki
Beef negimaki pairs well with simple sides that complement its savory and sweet flavor. Here are a few delicious ideas to complete your meal.
Steamed Rice
Fluffy white rice is one of the easiest sides to serve with beef negimaki. It absorbs the extra glaze and helps turn the rolls into a satisfying meal.
Cucumber Salad
A refreshing cucumber salad adds a crisp texture and balances the rich flavor of the beef. Try adding rice vinegar, sesame oil, and a little soy sauce for a Japanese-inspired side.
Steamed Vegetables
Broccoli, green beans, asparagus, or bok choy make excellent accompaniments. Their fresh flavor pairs well with the caramelized beef.
Edamame
Steamed edamame is a simple side dish that adds color, texture, and plant-based protein to the meal.
Miso Soup
A warm bowl of miso soup can complement beef negimaki when you’re preparing a Japanese-inspired dinner at home.
Can I Make Beef Negimaki in a Skillet?
Yes! A skillet is an excellent alternative to a grill. In fact, it’s often the easiest method for preparing beef negimaki in a home kitchen.
Heat a heavy skillet over medium-high heat, add a little oil, and arrange the beef rolls seam-side down. Rotate them regularly to brown the outside evenly.
Apply the glaze near the end of cooking and monitor the heat carefully to prevent the sauce from burning.
A cast-iron skillet works particularly well because it retains heat and can help create a flavorful browned exterior.
How to Store Leftover Beef Negimaki
If you have leftover beef negimaki, allow the cooked rolls to cool and transfer them to an airtight container. Refrigerate them promptly.
Store cooked leftovers in the refrigerator and consume them within 3–4 days, following standard food safety guidelines.
To reheat, place the rolls in a skillet over medium-low heat. Add a small splash of water or a little reserved sauce to help prevent them from drying out.
You can also use a microwave, but heat the rolls in short intervals to avoid overcooking the thin beef slices.
Can I Prepare Beef Negimaki Ahead of Time?
Yes. You can assemble the beef rolls several hours before cooking.
Place the prepared rolls in a covered container and refrigerate them until you’re ready to cook. Keep the raw beef cold throughout preparation, and prepare the serving glaze separately.
Cooking the rolls shortly before serving generally provides the best texture and flavor.
Frequently Asked Questions
What does beef negimaki mean?
Beef negimaki refers to beef rolls wrapped around scallions. The term “negi” refers to scallions or green onions, while “maki” means roll.
What is the best beef for negimaki?
Flank steak is a popular option because it can be sliced thinly and wrapped around the scallions. Ribeye and top round can also be used, depending on your preferred flavor and texture.
Can I use regular green onions?
Yes! Regular green onions, also called scallions, work well for this recipe. Trim the ends and cut them into pieces that fit inside your beef slices.
Why does my beef negimaki fall apart?
The beef may be too thick, the rolls may be too loosely wrapped, or there may be too much scallion filling. Try slicing the beef thinner, reducing the filling, and securing the rolls with toothpicks.
Is beef negimaki gluten-free?
Traditional soy sauce often contains wheat, so it is not necessarily gluten-free. To make a gluten-free version, use certified gluten-free tamari and check all other ingredients for gluten-containing additives.
Can I freeze beef negimaki?
You can freeze cooked beef negimaki, although the texture of the beef and scallions may change after thawing. For the best quality, enjoy the rolls fresh or refrigerated within the recommended storage period.
Final Thoughts
This Beef Negimaki recipe is a delicious way to enjoy tender beef and fresh scallions with a flavorful Japanese-inspired glaze. The rolls are simple enough for a weeknight dinner but attractive enough to serve at a gathering.
The key to great beef negimaki is slicing the beef thinly, rolling it tightly, and cooking it carefully so the exterior browns while the center remains tender. Finish the rolls with a sweet and savory glaze, serve them with steamed rice or vegetables, and enjoy a homemade meal packed with flavor.
If you try this recipe, experiment with your favorite sides and adjust the glaze to suit your taste. It’s an easy recipe to customize and a great addition to your collection of beef recipes.
Enjoy your homemade beef negimaki!
Recipe Card
Beef Negimaki Recipe
Thinly sliced beef wrapped around scallions, seared until browned, and finished with a sweet and savory glaze.
Prep Time: 30 minutes
Cook Time: 15–20 minutes
Total Time: 45–50 minutes, excluding optional chilling and resting
Servings: 4–6
Course: Appetizer or Main Course
Cuisine: Japanese-inspired
Ingredients
- 1 ½ pounds flank steak, thinly sliced
- 12–16 green onions, trimmed
- 1 tablespoon neutral cooking oil
- Toothpicks
Glaze:
- ½ cup low-sodium soy sauce
- ¼ cup mirin
- 2 tablespoons honey
- 2 tablespoons sake
- 1 teaspoon grated ginger
- 1 teaspoon sesame oil
- 1 tablespoon sesame seeds
Instructions
- Chill the flank steak for 20–30 minutes to make slicing easier.
- Slice the beef thinly against the grain and pound gently if needed.
- Combine the soy sauce, mirin, honey, sake, ginger, and sesame oil in a saucepan. Simmer for 5–8 minutes.
- Trim the scallions and cut them into pieces suitable for rolling.
- Place scallions on each beef slice and roll tightly. Secure with toothpicks.
- Heat a skillet or grill over medium-high heat and add oil if using a skillet.
- Sear the rolls seam-side down, turning to brown multiple sides.
- Brush with glaze near the end of cooking. Cook to a safe internal temperature.
- Rest briefly, remove toothpicks, slice, and serve with reserved glaze and sesame seeds.
Notes
- Slice beef against the grain for a more tender texture.
- Apply sweet glaze toward the end to reduce the risk of burning.
- Keep raw and cooked food separate during preparation.
- Refrigerate leftovers promptly and use within 3–4 days.